Thanks to those of you who voted in our last challenge. We continue to have record numbers voting in our weekly challenges and I cannot tell you how much it means to me to have our competitors projects seen by so many…
For those of you who are visiting from Pinterest today, welcome. SYTYC is a craft and DIY competition. Each Monday we feature themed projects created by our competitors. Please help us out and cast your vote…
The winner of our scraps challenge is Crystal.

Crystal’s on something of a roll having picked up our In the Kitchen Challenge with her chalkboard serving tray…
And then picked up our Fall Challenge with her reversible fall pillow…
Today Crystal is sharing her rainbow baby quilt tutorial.
Rainbow Baby Quilt Tutorial
I am so excited I get the opportunity to share another tutorial with you! Thank you so much for voting for my scrappy quilt!
I really enjoy quilting. I made my first quilt when I was 17, it was a king size quilt for my bed at college, not something I would recommend for your first quilt! These days I mostly stick to baby quilts.
This quilt would be a great project for a beginner, it is easy to make and the end result is stunning. I know some people are a bit intimidated by the idea of making a quilt, but trust me, if you can sew a straight line, you can make this quilt!
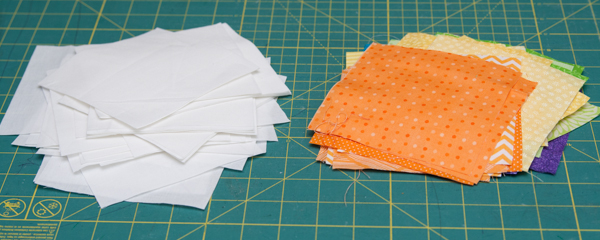
For the front of the quilt and the chevron on the back you will need some 5†x 5†squares. The easiest way to cut squares of fabric is with a rotary cutter, a self healing mat, and a quilting square. The number of squares of each color you will need is listed below:
White: 56
Red: 5
Orange: 9
Yellow: 14
Green: 14
Blue: 9
Purple: 5
You will also need two rectangle for the back, one that is 35†x 7†and one that is 35†x 26â€, and a piece of quilt batting about 36†x 40â€.
Once you have all your squares cut, draw a diagonal line across all of your white squares.
Lay one white square on top of a color square with right sides together. Sew on both sides of the line you drew, ¼â€ from the line. Repeat with all your squares.
Cut along the line between the 2 seams so you end up with 2 squares.
Press the seam away from the white side. Repeat with all the squares.
Next you will sew the squares into 10 rows of 9 squares. To sew the squares together, place 2 squares right sides together with the color side of one square lined up with the white side of the other. Sew along the side; continue adding squares until all nine are sewn in a row. Press the seams open. Refer to the drawing below for the color order of each row.
Once you have all the squares sewn into rows, sew the rows together. Press the seams to one side.
Take the remaining squares and line them up to create the chevron pattern using three squares of each color. Sew them into two rows like the ones shown in the drawing below. Then sew the two rows together. Sew your large rectangles for the back on either side of the chevron.
Next you will sandwich the batting between the 2 quilt layers. I like to use a basting spray to hold everything in place while I quilt. You can find basting sprays in the quilting section of any fabric store.
Lay your quilt top out face down on the floor. Spray the back of it with a basting spray. Spread the quilt batting over the quilt top. Spray more quilt basting spray on the batting then spread the quilt back face up over the batting.
Quilt all three layers together by sewing straight lines along the vertical and diagonal seams of the quilt. I find that a walking foot is really helpful for this step, it helps move all the fabric under your sewing machine foot.
After you finish quilting, bind the edges of the quilt. I used a double fold binding that is machine sewn to the front and hand stitched to the back. You can find more tips on quilt binding on my blog HERE.


The color placement looks intimidating, but WOW! I wonder if I could dig out the right color scraps…
Awesome quilt. Perfect way to use some of my colorful scraps. Thank you!!