• Business + Productivity
  • Creative Projects
  • Recipes
  • Travel
    • Disneyland
    • Facebook
    • Instagram
    • Pinterest
    • Twitter

Tauni Everett

Bibbidi Bobbidi Chew

Tauni Everett » Crafts and Home DIY » DIY Valentine Initial Mugs

DIY Valentine Initial Mugs

Is Valentine’s Day sneaking up on you?  Don’t worry, I have you covered with this quick and simple last-minute Valentine Day Idea – DIY Valentine Sharpie Initial Mugs.  So Cute!  I’m Mandy and am coming to you today from www.SugarBeeCrafts.com – I love being here at SNAP Creativity!

DIY Valentine Initial Mugs

These can be made for teacher or friend gifts; I used them as gifts for my kiddos.  We don’t go too all-out for Valentine’s, but we do give them a little treat, and I knew mugs would be the perfect way to present the gift.

Dot+marker+mug1

This is actually the first time I’ve tried decorating a mug with marker – and I’m hooked!  I even tested it for you and ran it through my dishwasher and it stayed on perfectly – a win!

Last+minute+gift+diy+sharpie+mug1

So, let me tell you all about it – on to the tutorial!

First, gather your supplies – you’ll need:

-a mug (I grabbed mine at the thrift store)

-rubbing alcohol

-a stencil (I used my cutting machine, but you could easily punch a circle out of contact paper and cut the initial using an exacto knife)

-markers in a few colors – oil-based sharpie

039+copy1042+copy1
I want to reinforce – I did not use a regular permanent marker – I used one that is oil-based!  As you can see on the package, it says “marks on wood & glass”
041+copy1

Prepare your mugs by wiping them down with rubbing alcohol to clean the surface. Now, on to the design – I tried two different techniques and I love them both.

First up, the stripes.  I thought the stripes would appeal more to my boys.

Initial+sharpie+line+mug1

I placed the stencil on my cup and using a straight edge of paper, I drew one line near the middle of the design:

044+copy1

Then after that, I just started layering the lines above and below.  Make sure to extend past the circle. I varied the pattern.  I made some longer and some shorter.  I made some thicker and some thinner.  It’s fun to get creative!

045+copy1

When done, simply peel off the template – this is my favorite part!  Your masterpiece is revealed.

046+copy1

The second technique I tried was dots – I thought my girls would love these ones.  They’re so cute and fun!

Initial+sharpie+dot+mug1

Again, attach the stencil.  Then start with a few dots around the edges.

047+copy1

Then switch colors and add more dots.  Vary the size and colors.

048+copy1

I tried to work from the edges out, switching colors pretty frequently.  Just keep going until you feel like you’ve covered most of the negative space:

049+copy1

Then again, peel the template and be amazed by your awesome creation:

050+copy1
Now, the big question – how to get that design to stay!
This worked for me – maybe mugs are different, so I’m not sure it’ll work for everyone.
First off, I let my design “set” for a couple of days – just sitting out.
Then, I put my mugs on a cookie sheet and put them into a cold oven.  After they were placed in there, THEN I turned the oven on to 375 degrees.  I baked them for 30 minutes.
012+copy1
After the 30 minutes was up, I turned off the oven, but I left the mugs in there.  I let them cool down slowly while inside the oven.  The colors did darken just a little after being baked.
I let them continue to “set” for the rest of that day.
And then the big test – did it work?  I put them into the top rack of my dishwasher and hoped for the best…. and ….  worked!!  here it is, right out of the dishwasher – phew!
001+copy1

I think they are perfect to fill with candy or chocolates or hot cocoa – so so fun.

Sharpie+dot+diy+mug+decor1

My kiddos are really excited to have their very own mug – it’s the little things that they love.

079+copy1

Looking for more last-minute Valentine Craft Ideas?

Try out these (and more) that can be found on my blog via the links below:

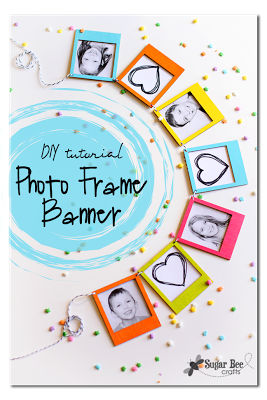
Hippie Heart Headband  |  Mini Photo Frame Banner
How+to+make+a+hippie+heart+stretchy+headband+copy1     Photo+frame+mini+banner+tutorial

Hope to see ya over at www.SugarBeeCrafts.com!

Craft Blogger

about me
post summary
Popular Posts


Snap

Snap

Editor at Tauni Everett
Snap has contributed 472 articles on https://taunieverett.com since October 2, 2012.


Power Bio Box by Zyra Console


You are here:
Home
Crafts and Home DIY
DIY Valentine Initial Mugs
Title:
DIY Valentine Initial Mugs

Authors:
  • Snap
Categories:
  • Crafts and Home DIY
Mentions:
Valentine’s Day

Keywords:
DIY Valentine Initial mugs

Last Updated:
November 15, 2018

  • 10 Amazing Spring Cleaning Tips
  • Valentine’s Hearts & Stripes Wood Banner
  • End of School Award Ribbons
  • Turn a Lamp Shade Into a Pendant Light
  • Chinese Paper Lanterns
  • Cardboard Yarn Ornaments
  • My 14 Favorite DIY Halloween Costumes
  • 18 Pumpkin Crafts

«
»

Crafts and Home DIY

Comments

  1. Heather Smith {Woods of Bell Trees} says

    February 12, 2014 at 3:09 am

    I absolutely love these! I have been apprehensive to try doing up mugs like this, but I will be giving this a shot now. These are so special especially compared to just a plain mug.

Featured Posts

Disneyland Lunar New Year Mandarin Mousse Cake

The Best Disney Lunar New Year Food

Disneyland Lunar New Year Festival Entrance

Disney Lunar New Year

12 CLASSIC DISNEYLAND TREATS 1

12 Classic Disneyland Treats You Can Get All Year Round

Disneyland Snacks that Will Not Wreck Your Diet Bengal Outback Skewer

10 Disneyland Snacks That Will Not Wreck Your Diet

WordPress Hosting by House of Ideas

Copyright © 2025 SNAP! Creativity · Design by: Key Lime Digital Designs· Darling Theme